How to Replace a Pool Liner
Considering replacing your vinyl pool liner? At some point or another, every vinyl-lined pool will need to have the liner replaced. Over time, the vinyl material dries out and deteriorates, leaving cracks and tears that can lead to much larger problems beyond the eyesore created in your pool. Replacing the liner yourself can save quite a bit of money compared to a professional installation, and Leslie’s can help you make it happen.
Should You Repair or Replace Your Pool Liner?
Minor leaks and tears in isolated areas can often be repaired using a vinyl liner patch kit. However, at a certain point, the age and appearance of the liner will start playing a role in this decision. In general, most vinyl liners have a lifespan of around 10–15 years with proper pool care and maintenance.
The older a liner gets, the more UV radiation, chemistry imbalances, improper chemical dosing, and other factors will take a toll and degrade the liner. Overstretched areas and wrinkles in the liner — often caused by poor installation or groundwater issues — can also impact the liner’s integrity. In time, the liner becomes brittle, and cracks and rips become common. When your liner reaches the tipping point, no amount of patching your vinyl liner will keep up with the ongoing repair needs. You may even begin to notice excessive water loss caused by leaks around the pool. Keep an eye on the waterline, where the liner is most susceptible to stretching, drying, and cracking.
Something else to consider is the appearance of the liner. As mentioned earlier, the sun’s UV rays and the chemistry of your water can have a negative impact. The once-rich colors may appear muted, and portions of the floor or walls may show an array of faded, discolored, or permanently stained spots. When your pool reaches that point, it’s probably time to consider a liner replacement.
When is the Best Time to Replace a Pool Liner?
The best time of year to replace a vinyl pool liner is in the fall or early spring, right before closing or opening the pool. However, you may opt to do it in the spring, so you can start the season with fresh, clean water. Replacing the liner can be a time-consuming process! Between draining the pool, removing the old liner, installing the new liner, and refilling and rebalancing the pool, there's a lot to it. If you wait until the summer season is in full swing, you may miss out on valuable swim time.
5 Steps to Replace a Vinyl Pool Liner
Before getting started, make sure you have all materials on hand. It also helps to have extra hands available so the installation goes smoothly. Keep an eye on the weather, and avoid replacing your liner immediately before or after storm or heavy rains.
1. Order Your Supplies

Start by ordering your new inground pool liner. You may also want to order replacement faceplates and gaskets for your skimmer, plus new drain covers and returns (if needed).
New Inground Pool Liners
The ordering part may take a while for this one, since all inground pool liners are custom orders. Start by calling Leslie’s customer support team (1-800-LESLIES) or filling out the online contact form. You’ll also need to complete the liner measurement form. This form includes the liner thickness and pattern, bead type, pool shape, pool size, step location, and other important details needed to replace your pool liner.
New Above Ground Pool Liners
It’s much easier to order an above ground vinyl pool liner. All you need to know is the shape, size, and wall height of your pool, as well as the bead style required. Then you can choose a new above ground pool liner from our diverse selection of in-stock and ready-to-ship colors and patterns. Need help deciphering your options? We have a helpful article that can help you decide which above ground liner will work best for your pool.

2. Drain the Water
To replace a pool liner, you'll need to drain the water safely to a location that won’t recycle beneath the pool. If your pool is on a slope, direct the water downward. Use a submersible pump to empty the pool completely.
Before draining any water, we strongly recommend consulting with a pool professional first to avoid damaging the pool structure. For example, draining an inground pool while the water table is high can cause a “popped” pool, which can cost thousands to fix (if it’s even fixable at all). We also suggest checking local ordinances for instruction on how to handle drain water.
PRO TIP: Not comfortable draining the pool? You can hire a pro to help with the draining process, and then you can take care of the rest. Leslie’s offers draining services in many areas, and you can even request an appointment online.
3. Remove the Old Liner

Once all water is out of the pool, remove all faceplates, gaskets, drain covers, returns, and other fittings from the pool walls and floor. Place screws and other small parts in separate, marked zip baggies.
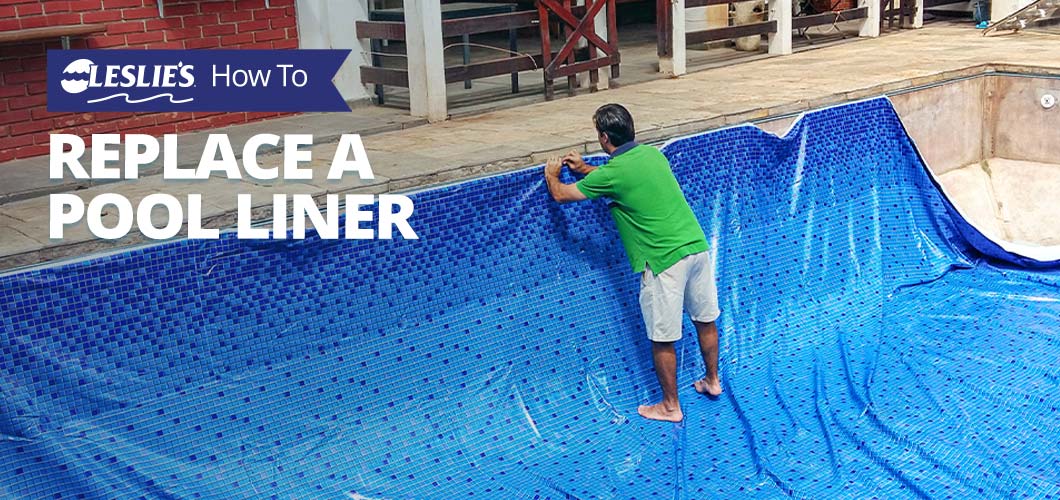
Cut the old liner into manageable 4-foot sections with a razor knife, then roll up and remove them from the pool. For inground pools, remove the walls first, and save the floor for last. For above ground pools with overlap pool liners, remove the coping strips to release the liner. Older above ground pools may need to have the top rails removed first in oder to replace the pool liner. For beaded pool liners, pull up on the bead to remove it from the track.
4. Prep the Pool

Clean and inspect the walls and floor of the pool. If any surface prep is required, now is the time to get it done. Clean off the walls, and sand and paint any rusty spots. Use either vermiculite, sand, or concrete to fix any floor cracks, divots, or uneven floor areas. If you need to protect the new liner from rough wall spots and potential rust abrasion, get yourself some wall foam (commonly used on above ground pools).
Next, install the bottom gaskets on your skimmer, drains, and returns, and hold them in place with pieces of duct tape.
For above ground pools, may also need to install a new liner pad on the floor and set the pool cove into place. The new pad will protect the liner and your feet against sharp stones and objects on the ground below, and the coving will provide a smooth edge between the walls and floor.
5. Install the New Pool Liner
This process will vary somewhat for inground and above ground pools, but both are fairly similar.
PRO TIP: When you’re ready to install the liner, it’s important to work as quickly and efficiently as possible. The longer your pool liner is exposed to direct sunlight, the more likely you are to have problems with it down the road. It’s the same reason you don’t want to remove water from a vinyl pool after filling — doing so can accelerate puckering, drying, and cracking of the liner. If this happens, you'll need to replace the new pool liner even sooner.
Installing an Inground Pool Liner
With an inground pool, pull the liner slowly over the pool. We recommend doing this with 1–3 helpers, since you’ll need to simultaneously lock the liner bead into the track at the top of the wall.
Set the liner with a liner vacuum (or use one or more 5-HP wet/dry shop vacs) to suction the liner to the walls and floors and remove any wrinkles. Run the hose through the skimmer and down the wall a few feet, sealing the top of the skimmer with duct tape and/or plastic.
Install the main drain gasket, ring, and cover after you get the liner vacuum-set and mostly wrinkle-free. Move carefully on the vinyl in bare or stocking feet (no shoes!). To navigate the slope, use a long rope or cord to enter and exit the deep end safely.

Once the liner is set inside the pool, suctioned flush with all surfaces, and completely free of wrinkles, it’s time to add water. Fill the pool completely full as quickly as possible. You’ll want to keep the liner vac running until the water is about 6” deep in the shallow end. Then you can remove the vacuum hose from behind the liner.
At this point, you can screw down the side and bottom trim plates for the in-pool step. Screw on any underwater light rings when the water reaches the light. Reinstall faceplates and top gaskets for skimmers and returns when the water level reaches the skimmers. Make the screws as tight as possible, using a #3 Phillips head, then cut out the vinyl inside the faceplates. New gaskets and faceplates for skimmers, returns, and drains are always recommended when replacing an inground pool liner.
Installing an Above Ground Pool Liner
Unroll the new vinyl liner inside the pool, following the enclosed unpacking directions. The way you install the liner depends on the bead type. With 1 or 2 other people working around the pool, carefully drape an overlap-type liner over the pool edge. Slowly work around to pull the liner evenly over the pool wall. Then, install the cover clips to lock the liner in place. Beaded above ground pool liners will lock into a bead receiver or track at the top of the wall, while J-hook liners have a rigid plastic hook that hangs on the wall.
Be sure the liner is hanging straight and is centered evenly over the pool before you begin to fill it back up again. The middle of the liner should touch the floor, but there should be some lift-off from the floor as the liner nears the walls. The liner should not look twisted, and should hang straight down the walls. Overlap liners should overlap the wall evenly, within ¼” variance, all the way around the pool. Beaded liners may use a liner vacuum to suction out the air behind the liner (as described above) to remove most wrinkles quickly and easily.
Now you’re ready to start refilling the pool with water. As the pool fills above 3” deep, quickly work to remove wrinkles by pushing them towards the walls, using a soft push broom, squeegee, or just your hands and bare feet. Continue this operation where needed, until the pool has at least 12” of water or more. By this point, it’s important that the liner be completely wrinkle free, because wrinkles will be much more difficult to remove as the pool continues to fill.
Install new gaskets and faceplates for the skimmer and return once the pool is full. With the filter system assembled and attached, cut out the vinyl inside of the skimmer and return faceplate with a razor knife to flood the lines.
Get Ready to Swim!
With a few good friends or motivated family members, a DIY pool liner replacement and installation can bring new life to your pool and backyard. Opting for the “do it yourself” route can also keep hundreds — or even thousands — of dollars in your wallet.
Once the pool is refilled, bring a water sample to your local Leslie’s for a free in-store AccuBlue water test and treatment plan. Our friendly team of pool experts can help you start your pool off on the right foot. If you’re looking to get the most out of your new liner, maintaining correct water chemistry can drastically improve its lifespan.
