How to Change Pool Filter Sand
Sand filters are popular because they’re one of the most affordable, low maintenance methods for pool filtration. Aside from an occasional backwash, you only need to replace the filter media (sand) every 3-5 years, or sometimes even longer. The frequency of which you change your pool filter sand depends on several factors, including the size of the filter in relation to the pool, the quality of the sand, and various aspects of your pool care routine.
If you notice your filter isn’t working as efficiently as it used to, or if you’re having to backwash the filter more and more frequently, it’s probably time to replace the filter media. Old, worn-out filter sand can ball up or create channels through the media, greatly reducing its filtration efficiency. When the time comes to replace the sand in your pool filter, this easy-to-follow guide can help any pool owner get the job done right, regardless of previous experience.
Highlights include:
Turn off pump, drain water from filter, and remove the lid or top mount valve.
Take out all the old filter sand, then thoroughly clean and inspect filter components.
Replace filter media with sand or a suitable alternative. Reinstall lid or valve.
Turn on the pump and run a backwash cycle on the filter. Your filter is now ready to use!
1. Gather Your Supplies
Before you get started, make sure you have all the essential tools and supplies on hand and ready to go. Taking a few minutes to gather everything you need and place it near the sand pool filter will make the entire process so much faster and easier.
Required Job Materials:
- Standard Flathead and Phillips Screwdriver (when dealing with filter clamps)
- Strap Wrench or Filter Lid Tool (when dealing with threaded filter types)
- Hand Saw (if top mount multiport is hard-plumbed with no union connections)
- Rubber Plug, Sock, Plastic Bag, or Duct Tape (to cover the standpipe inside the filter tank)
- Wet/Dry Shop Vac and/or a Small Scoop/Cup
- Small Tarp or Several Five-Gallon Buckets (you’ll need at least 3-5 buckets to hold and transport old filter media)
- Garden Hose with Spray Nozzle
- Gasket/O-Ring Kit
- Teflon- or Silicone-Based Pool Lube
- Replacement Filter Media – Several Options Available
- #20 Grade Silica Sand
- Zeolite Sand
- FilterBalls
- Glass Filter Media
- Pea Gravel (recommended in certain scenarios, such as when the sand filter is 30” or larger)
DIY TIP: To protect your eyes, lungs, and skin, we suggest using a few pieces of Personal Protective Equipment (PPE). These items include safety glasses, an N95 dust mask, leather or gardening gloves, closed-toed shoes, and a towel or long-sleeved shirt (especially when reaching inside fiberglass filter tanks).
2. Evacuate Water From the Sand Filter Tank
First, turn off power to the pump motor. As a safety precaution, flip the switch at the breaker panel to prevent unintended operation while you’re working on the filter. Next, open the air relief valve on the filter to release pressure in the system, allowing most of the water inside the filter tank to return to the pool. Finish up by removing the drain plug cap, located at the bottom of the sand filter tank, to empty the remaining water and (and extra weight).
3. Remove the Filter Valve or Lid
Depending on the model of sand pool filter you have, this step will vary slightly. The important thing here is to remove the top lid closure or top mount multiport valve to gain access to the filter internals. If your top mount filter valve does not have unions installed for easy removal, you’ll need a hand saw to cut the plumbing lines.
Top Mount Valve
If your filter has a top mount multiport valve, be especially careful when removing it from the standpipe. You don’t want to damage the internals in the bottom of the tank! Then, place a sock, sturdy plastic bag, or piece of duct tape over top of the standpipe. Or, if you have a rubber plug that will fit, place it in the opening. This will prevent sand from falling inside, which can either clog up the filter or end up in the pool.
Side Mount Valve
If your sand filter has a side mount multiport or slide valve, set the valve to the closed position, and remove the top lid. You’ll see the baffle/diffuser and air relief tube just beneath the lid closure. Remove and clean the screen filter on the end of the air relief tube, and also clean the tip of the tube. Blow through the tube to make sure there are no obstructions, and then reinstall the screen on the end of the tube. Carefully move the baffle off to the side, so that the tank opening is completely unobstructed.
4. Take Out the Old Filter Media
Use either a wet/dry shop vac or a small cup or scoop to carefully remove all the old filter media. Place it into five-gallon buckets or dump it onto a nearby tarp to keep it all contained. Remember that sand triples its weight when wet, so be careful not to overexert yourself, and take your time. If you’re going to reach down inside the tank, wear a long-sleeved shirt or place a towel around the tank opening to prevent fiberglass splinters.
5. Spray Down the Sand Filter Tank
Using a garden hose with spray attachment, thoroughly rinse the inside of the sand filter tank. This will help you finish removing any remaining filter media stuck to the walls or filter components.
6. Inspect All Filter Components
Be extremely cautious when handling the internal filter components. The laterals are somewhat fragile and can break easily if not handled with care.
If you have a top mount sand pool filter valve with standpipe assembly, you can fold up the laterals and remove the assembly from the tank for closer inspection. On the other hand, if you have a side mount filter, the laterals will be more difficult to remove. You can detach each lateral individually, if needed.
Thoroughly inspect the internals, and replace any broken or worn components. If any laterals are cracked or bent, now is the time to replace them. If you removed the lateral assembly, place it back inside the tank, and fold the laterals down. Make sure the assembly is positioned correctly in the center of the tank.
7. Add New Media to the Sand Filter Tank
Depending on the type of filter media you’re using, the approach for adding replacement media and the quantity required will differ slightly.
Sand, Zeolite, or Glass Filter Media
Check the drain plug o-ring for signs of wear or cracking, and replace and/or lubricate before reinstalling at the bottom of the filter tank. Fill the tank about halfway full of water to protect the laterals against uneven media weight. Using a cup or small scoop, slowly ladle the replacement filter media inside to create a sand bed for the laterals. If the pool's sand filter tank is 30” or larger, add the manufacturer’s recommended amount of pea gravel first, before adding the filter media. You can find this information in the product manual for your filter.
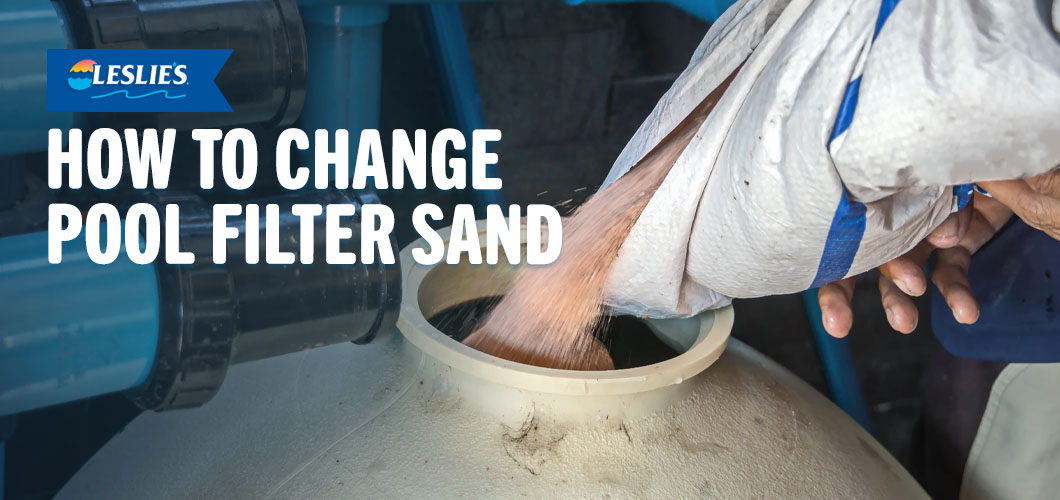
Once a proper sandbed has been established and the laterals are protected, carefully pour the bags of replacement filter media into the sand filter tank.
FilterBalls
Check the drain plug o-ring for signs of wear or cracking, and replace and/or lubricate before reinstalling at the bottom of the filter tank. Place the FilterBalls inside by hand.
DIY TIP: Which type of filter media should you use? Silica sand is cheapest to purchase, but it doesn't offer the same benefits as other sand alternatives. When choosing new filter media, it's important to not only consider the price, but also the filtration ability, water and energy savings, maintenance level, longevity, and disposal options. We recommend upgrading your filter with Leslie's Natural Zeolite Sand, which offers 90% better filtration than regular #20 grade silica sand. Zeolite requires fewer backwashes, you only need half as much inside the filter, and it can help control chloramines in your pool. It's also a natural, environmentally friendly, safer alternative to silica sand.
8. Reinstall the Filter Valve or Tank Lid
Depending on which type of sand filter you have, either remove the plug/sock/bag/tape from the standpipe, or move the baffle and air vent tube back into place. Next, replace and/or lubricate the top lid or multiport valve o-ring/gasket. If your o-rings and gaskets are cracked, crimped, or showing signs of wear and tear, now is the perfect time to replace them to avoid leaks and other issues in the future. It’s a good idea to keep a spare gasket and o-ring kit on hand for all your essential pool equipment.
If there is any sand or filter media around the tank opening, clean it off. This is especially important if you have a threaded tank opening.
Now you’re ready to securely reinstall the top lid or multiport valve on the filter tank. If the top mount multiport valve was cut out of the system, we suggest replumbing with a union kit to prevent the need for future cutting.
9. Turn On the Filtration System
Set your filter’s push-pull slide valve or multiport valve to the "Backwash" position. Turn the power from the breaker back on, and allow the system to backwash for 3-5 minutes on high speed, or until the water coming out from the backwash hose runs clear. When a steady stream of water comes out of the air relief valve, the air has been purged from the system, and you can twist it closed.
Once the backwash cycle is complete, if you have a multiport valve, shut the system off, set the valve to “Rinse,” turn the pump back on, and let the system run for 30-60 seconds.
Next, shut the pump off one more time, and set the push-pull slide valve or multiport valve to normal operating “Filter” position. Turn the system on again, and your pool filter is ready to clean the pool!
Questions?
If this is your first time changing the filter media in your sand pool filter, this whole process might sound a bit overwhelming. But don’t worry! If you run into any issues, the friendly pool experts at Leslie’s are here to help. Call or stop by your local Leslie’s store for more information about filter care, replacement parts, or other routine pool maintenance tips.
If this guide made you reconsider changing the filter sand yourself, don’t sweat it. Let one of our certified technicians do it for you! It’s easy to schedule an appointment online or in-store, and we’ll help get your filter running efficiently for the season ahead.
JUMP IN WITH US ON SOCIAL!